One Background Two Ways (ft. Reverse Confetti)

Make A Big Wish #handmadecard by Tatiana Trafimovich #tatianacraftandart - Birthday Wishes stamp set by Reverse Confetti #reverseconfetti

Happy Tuesday ‘Fetti’s Friends and Fans!!
I’ve popped in today to share my last post made for Reverse Confetti! It was so much fun to join their amazing Design Team last two months and I want to thank them again for this fantastic opportunity!!!

Make A Big Wish #handmadecard by Tatiana Trafimovich #tatianacraftandart - Birthday Wishes stamp set by Reverse Confetti #reverseconfetti

Now let’s focus on my today’s project! Do you remember me making a card using as a background Diamond Stripe Square Die? Here’s the post I’m talking about. When I used the positive part of the die on my first project, I hold in place the negative part with Press’n Seal and saved it for another card since I always try to make more out of my stamps and dies and stretch them as much as I can!

Diamond Stripe Die

So I started by popping all the tiny pieces of Diamond Stripe Square Die on a foam tape and adhering them on a square 4¼” by 4¼” white card base. Next I die cut and put back in place Candles die while I was coloring them with copic markers. I used again Press’n Seal to adhere all the tiny candles pieces on the foam tape and then placed them on the background all together. The sentiment from Birthday Wishes stamp set was simply heat embossed on a black cardstock and added on a foam tape as well.

Make A Big Wish #handmadecard by Tatiana Trafimovich #tatianacraftandart - Birthday Wishes stamp set by Reverse Confetti #reverseconfetti

Last but not least, I put a generous layer of a clear shimmer pen on the candles and added a coat of Glossy Accents on the candles’ flames along with a few clear sequins.

Hope you like this sweet card! As always thanks so much for stopping by and have a fantastic day!

Tatiana

COPIC MARKERS:
Y15-Y17-YR16-R05

SalvaSalva

SalvaSalva

SalvaSalva

SalvaSalva

SalvaSalva

SalvaSalva

SalvaSalva

SalvaSalva

SalvaSalva

SalvaSalva

SalvaSalva

SalvaSalva

SalvaSalva

SalvaSalva

SalvaSalva

SalvaSalva

SalvaSalva

SalvaSalva

SalvaSalva

SalvaSalva

SalvaSalva

SalvaSalva

SalvaSalva

SalvaSalva

SalvaSalva

SalvaSalva

SalvaSalva

SalvaSalva

SalvaSalva

SalvaSalva

Hey, Sugar – Stretch Your Dies Card Series (ft. Reverse Confetti)

Hey, Sugar #handmadecard by Tatiana Trafimovich #tatianacraftandart - Hey, Sugar stamp set by Reverse Confetti #reverseconfetti

Happy Friday ‘Fetti’s Friends and Fans!!
I’ve popped in today to share another sweet card featuring new and so adorable Hey, Sugar stamp set from the Reverse Confetti May Release!

Hey, Sugar #handmadecard by Tatiana Trafimovich #tatianacraftandart - Hey, Sugar stamp set by Reverse Confetti #reverseconfetti

I love the big bold images from Hey, Sugar stamp set. They are so fun and easy to color and so I die cut using Hey, Sugar Confetti Cuts and heat embossed a whole bunch of the sweet donuts with a white embossing powder on a Bristol paper and colored them using a rainbow palette and my Zig Clean Colour Real Brush markers. Please check the complete list of the colors used on this card at the bottom of this post. While the sweet donuts were drying, I prepared a long 7½” x 3″ card base and masked the top and bottom parts with a sticky tape.

Then I customize my own long stencil die cutting twice Polka Panel Confetti Cuts from a scratch cardstock and gluing both parts together. I decided to play with a tone on tone pattern since I didn’t want to distract the mail focus from the colored donuts and so I simply added textured dots with a white embossing paste on the white card base. Finally, I heat embossed the sentiment from the same Hey, Sugar set and once the embossing paste was dried, popped all the elements on a foam tape for a bit of dimension.

Hey, Sugar #handmadecard by Tatiana Trafimovich #tatianacraftandart - Hey, Sugar stamp set by Reverse Confetti #reverseconfetti

Hope you like this sweet card! As always thanks so much for stopping by and have a fantastic weekend!

Tatiana

ZIG MARKERS:
n.51 Lemon Yellow – n.52 Bright Yellow – n.70 Orange – n.25 Pink – n.26 Light Pink – Dark Pink – n.83 Lilac – n.82 Purple – n.80 Violet – n.41 Light Green – n.42 Turquoise Green – n.53 Ochre – n.72 Beige

SalvaSalva

SalvaSalva

SalvaSalva

SalvaSalva

SalvaSalva

SalvaSalva

SalvaSalva

SalvaSalva

SalvaSalva

SalvaSalva

SalvaSalva

SalvaSalva

SalvaSalva

SalvaSalva

SalvaSalva

SalvaSalva

SalvaSalva

SalvaSalva

SalvaSalva

SalvaSalva

SalvaSalva

SalvaSalva

SalvaSalva

SalvaSalva

SalvaSalva

SalvaSalva

SalvaSalva

Stamp Focus (ft. Newton’s Nook Designs)

Love #handmade card by Tatiana Trafimovich #tatianacraftandart - Newton's Christmas Cuddles stamp set by Newton's Nook Designs #newtonsnook

Happy Friday!

I’m so excited to be on the Newton’s Nook Designs blog today and give you a fun idea on how you can stretch your holiday stamps and dies! Curious?

Love #handmade card by Tatiana Trafimovich #tatianacraftandart - Newton's Christmas Cuddles stamp set by Newton's Nook Designs #newtonsnook

This year I decided to make a stamp focus card series and invite you to get another look on the crafty products you already have in your stash or bring more ideas on the same stamp or die set so that you can decide if you really want to get it! Today I would like to reuse holiday stuff and reinterpret it in a different way! And so I’m starting with a super adorable Newton’s Christmas Cuddles set from NND. This set is meant to be a holiday one, but the cute images are so versatile that you can easily cover many other occasions. I played with the lovely couple of kitties and transformed them into a love or Valentine’s Day card.

Love #handmade card by Tatiana Trafimovich #tatianacraftandart - Newton's Christmas Cuddles stamp set by Newton's Nook Designs #newtonsnook

The kitties were stamped on a watercolor paper with a black waterproof ink, colored with regular watercolors and finally fussy cut right against the stamp lines. Then I built a shaker element reusing a Snow Globe Shaker Die Set and filling it with a tiny die-cut hearts from Darling Hearts Die Set, sparkling sequins and beads because I loved the idea of falling hearts on the love card. And since I already had Darling Hearts Die Set on my desk, I die-cut the work “love” from a bright pink cardstock and used it as the sentiment.

That’s all for today! Hope you like this sweet card! Thanks so much for stopping by and have a fantastic day! And, please, let me know if you’re interested to see more posts from my Stamp Focus Card Series!!!

Tatiana

NND PRODUCTS USED:

Newton’s Christmas Cuddles

Snow Globe Shaker Die Set

Darling Hearts Die Set

Frames & Flags Die Set

Double Sided Adhesive Foam

Acetate Sheets

SalvaSalva

SalvaSalva

SalvaSalva

SalvaSalva

SalvaSalva

SalvaSalva

SalvaSalva

SalvaSalva

SalvaSalva

SalvaSalva

SalvaSalva

SalvaSalva

SalvaSalva

SalvaSalva

SalvaSalva

SalvaSalva

SalvaSalva

SalvaSalva

SalvaSalva

SalvaSalva

SalvaSalva

SalvaSalva

SalvaSalva

SalvaSalva

SalvaSalva

SalvaSalva

Craftin Desert Divas – October Release Sneak Peek – Arctic Pals


Happy Friday!

I’m up on Crafting Desert Divas blog today brining you my daily post and a peek on the new super adorable ARCTIC PALS stamp set!

All the products from the CDD November release will be available for purchase on Friday October, 17 at Craftin Desert Divas online shop!

Sending Christmas Cheer #handmadecard by Tatiana Trafimovich #tatianacraftandart - Arctic Pals stamp set by Craftin Desert Divas #craftindeserdivas

I mixed and matched a few CDD products creating the layout with a circle focal point on this card to get more use of the dies and the stencil I already have in my stash. But if you’re new to the cardmaking and don’t have all those fancy products yet, please, read this post because I’ll be giving the alternative ideas on how to create the same layout.

Here’re the steps to follow:

  • Cut and score an extended A2 size card base (5½” x 4¼”)
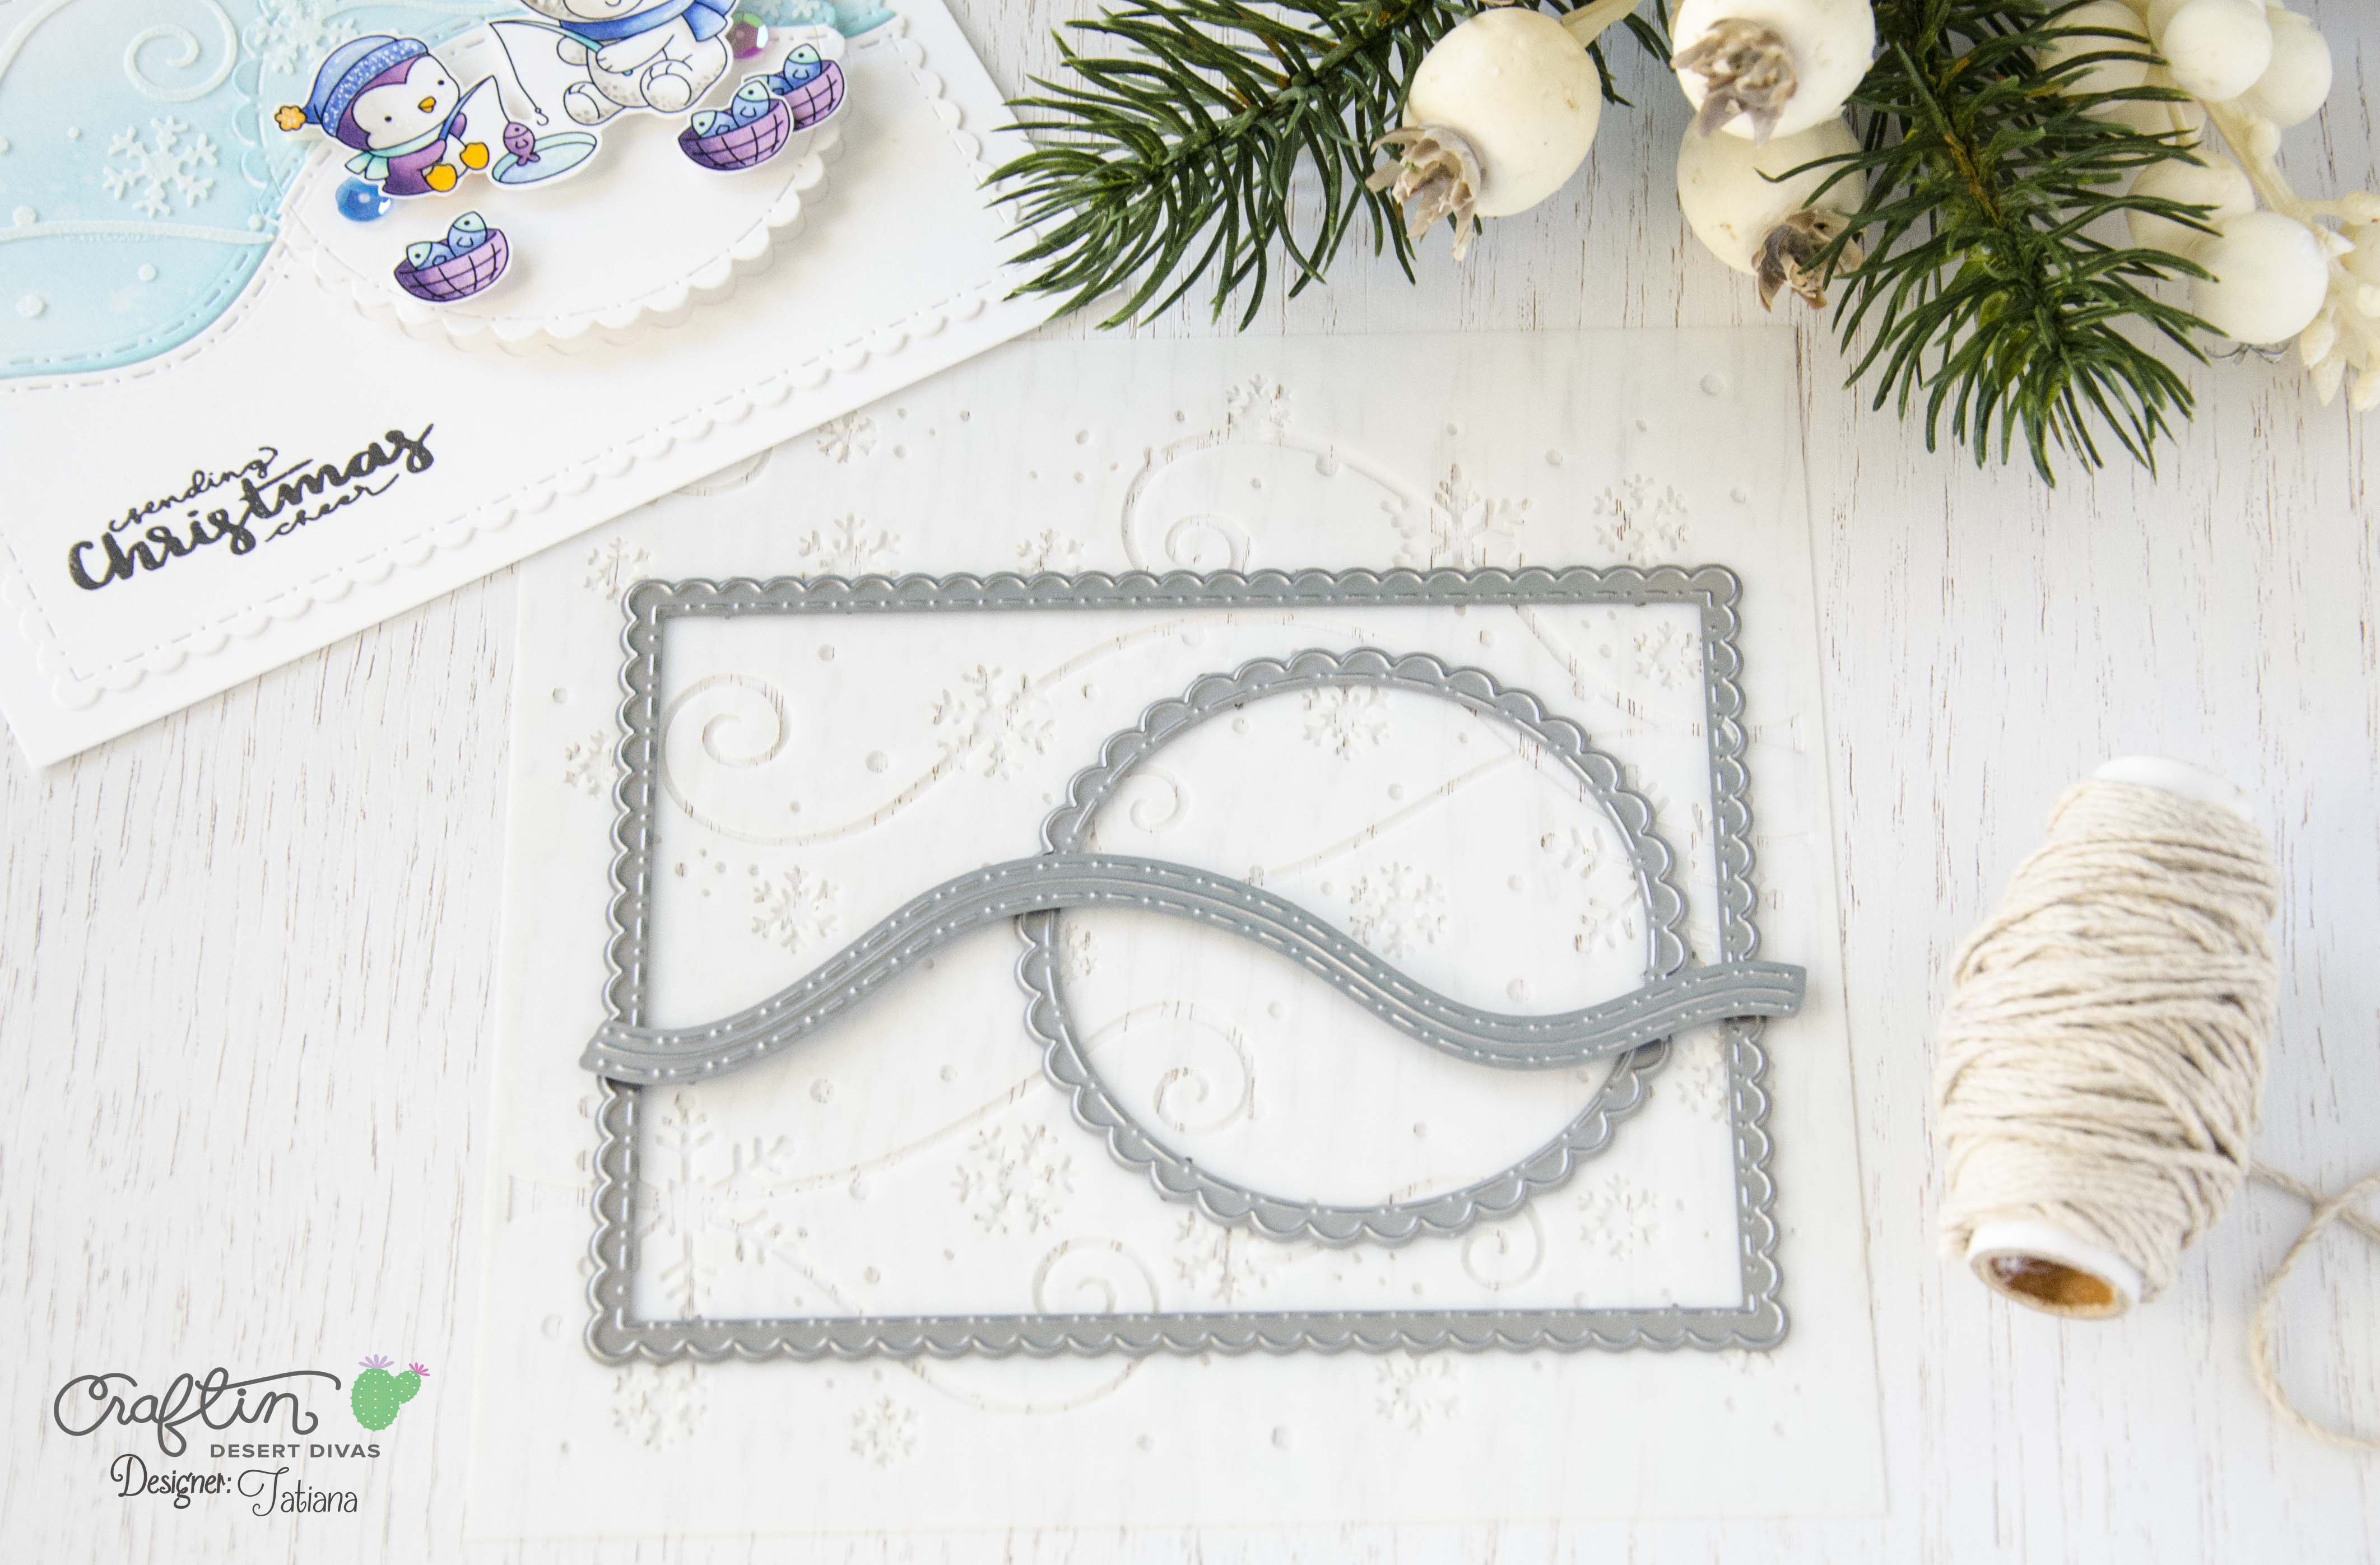
  • Die-cut a scalloped rectangle using Fancy Frame Dies or simply cut it out with your trimmer or scissors. The rectangle should be slightly smaller then your card base.
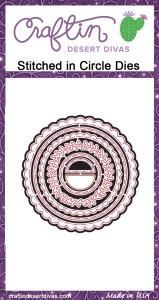
  • Die-cut a scalloped circle from Stitched In Circle Dies inside the rectangle or simply fussy cut it apart with you scissors. Use anything that have a round shape to achieve a perfect circle like a glass, for example, and trace around it a pencil line to help you at this step. Use a decorative scissors to achieve a fancy border on the rectangle and the circle.
  • Put the die-cut circle back in the negative place and secure it with a non permanent tape to keep it in place while you die-cutting the stitched border from Fall Border Dies or adhere the hand cut circle into the desirable position with a non permanent glue and use a cutter knife for a wavy line.
  • Add color to the die-cut parts above the wavy lines transforming them into the sky portion. I used a light blue ink and an ink blending tool for that, but you can use any color media you have on hand and let everything dry.

Sending Christmas Cheer #handmadecard by Tatiana Trafimovich #tatianacraftandart - Arctic Palls stamp set by Craftin Desert Divas #craftindeserdivas

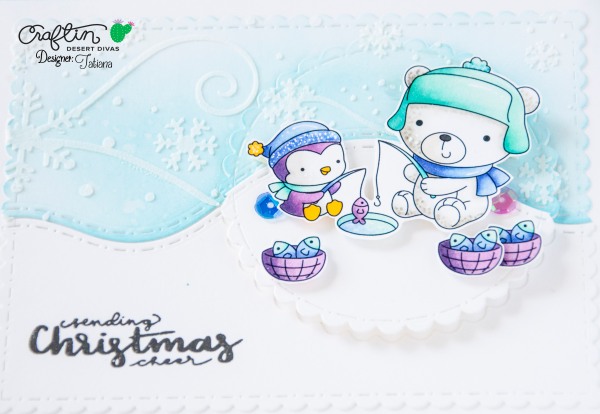
  • Keep the bottom part simply white and stamp the sentiment in the bottom left corner.
  • Stamp, color with any media of your choice and fussy cut the cute critters from Arctic Pals stamp set. I used here copic marker. Scroll down to the bottom of this post to see all the exact colors I used.
  • Once dried, apply the snowflakes to the sky portion through the Snowflake Flurries Stencil or simply draw you own with a white gel pen.
  • Start assembling the card. Adhere the rectangle piece straight to the card base. Pop up the top part of your circle on a foam tape. Then double the foam tape for the bottom part of the circle and finally pop up the colored stamps on top.

Sending Christmas Cheer #handmadecard by Tatiana Trafimovich #tatianacraftandart - Arctic Palls stamp set by Craftin Desert Divas #craftindeserdivas


Need more inspiration? Please, check Craftin Desert Divas Event Page on Facebook for more amazing projects and sneak peeks from the Design Team, freebies and awesome giveaways! As always thanks so much for stopping by!


COPIC MARKERS:

B21-B24-B26                 V12-V15-V17-V09                            BG10-BG11-BG15-BG23
W00-W1-W3-W5           Y17                                                     E40
100

SUPPLIES:

Arctic Pals stamp set (available for purchase on Friday November, 17)

Holly Jolly

Fancy Frame Dies

Stitched In Circle Dies

Fall Border Dies

Snowflake Flurries Stencil

Multi Medium Matte

Memento Dye Ink Pad – Tuxedo Black

Cutter Bee Scissors 5″

Craft Tweezers

Mono Sand Eraser

White Gelly Roll Medium Point Pen

DISCLOSURE:

As a Design Team Member I’m affiliate to Craftin Desert Divas online shop. Where available I use their compensated affiliate links which means if you make a purchase I receive a small commission at no extra cost to you. I really love their products and enjoy using them. All opinions are my own. I truly appreciate your support and will use the money raised to bring you more crafting projects.

SalvaSalvaSalvaSalvaSalvaSalva

SalvaSalva

SalvaSalva

SalvaSalva

SalvaSalvaSalvaSalva

SalvaSalva

SalvaSalva

SalvaSalva

SalvaSalva

SalvaSalva

SalvaSalvaSalvaSalva

SalvaSalvaSalvaSalva

SalvaSalva

SalvaSalva

SalvaSalvaSalvaSalva

SalvaSalva

SalvaSalva

SalvaSalvaSalvaSalva

SalvaSalva

SalvaSalva

SalvaSalva

SalvaSalva

SalvaSalvaSalvaSalva

SalvaSalva

SalvaSalvaSalvaSalva

SalvaSalva

SalvaSalva

SalvaSalva

SalvaSalva

SalvaSalvaSalvaSalva

SalvaSalva

SalvaSalvaSalvaSalva

SalvaSalva

SalvaSalva

SalvaSalva

SalvaSalva

SalvaSalva

SalvaSalva

SalvaSalva

SalvaSalva

SalvaSalva

SalvaSalva

SalvaSalva

SalvaSalva

SalvaSalva

SalvaSalva

SalvaSalva

SalvaSalva

SalvaSalva

SalvaSalva

SalvaSalva

SalvaSalva

SalvaSalva

SalvaSalva

SalvaSalvaSalvaSalva

SalvaSalva

SalvaSalva

SalvaSalva

SalvaSalva

SalvaSalva

SalvaSalva

SalvaSalva

Stretch Your Dies Card Series – Snow Globe Shaker Die (ft. Newton’s Nook Designs)

Joy #handmade card by Tatiana Trafimovich #tatianacraftandart - Snow Globe Shaker Die by Newton's Nook Designs #newtonsnook

Happy Thursday!

I’m so excited to be on the Newton’s Nook Designs blog today and give you another look at just released amazing Snow Globe Shaker die set and some great supplies for shaker cards that NND carries now in their online shop!

Joy #handmade card by Tatiana Trafimovich #tatianacraftandart - Snow Globe Shaker Die by Newton's Nook Designs #newtonsnook


I’m really in LOVE with these fantastic dies! So many possibilities and so much fun to play! And so my first project is a show globe clear shaker tag! What do you think about this idea? I die-cut all the elements from Snow Globe Shaker die twice since I needed to cover both front and back. Then I prepared two die-cut frames from the double sided adhesive foam, but you can definitely use only one layer instead since this foam is quite thick and it is really a must-have! Once I ran it back and forth in my Big Shot with a platform closed for the wafer thin dies, I finished to have a perfectly die-cut frame that held its shape as well. And don’t throw away any extra piece you left with since you can use them for the snow globe base. Assembling the tag I filled it with snowflakes that were also die-cut using the same Snow Globe Shaker die set and finished with the shiny die-cut sentiment “JOY”.

Joy #handmade card by Tatiana Trafimovich #tatianacraftandart - Snow Globe Shaker Die by Newton's Nook Designs #newtonsnook

Creating my second project which is turned out as a card, I used the same Snow Globe Shaker die, but in a very different way! I started building my background first by ink blending Cracked Pistachio, Mermaid Lagoon and Blueprint Sketch Distress inks. While the inks were still wet I put on top new just released Snowfall stencil and dabbed off some color with a wet baby wipe. I purposely was not very precise since I wanted to achieve a little bit splotchy distress look.Joy #handmade card by Tatiana Trafimovich #tatianacraftandart - Snow Globe Shaker Die by Newton's Nook Designs #newtonsnook

While the background was drying, I die-cut some snowflakes and the sentiment from a vellum and a glitter paper and finally assembled everything popping the background on a foam tape for a bit of dimension!

That’s all for today! Thanks so much for stopping by and have a fantastic day!

Tatiana

SalvaSalva

SalvaSalva

SalvaSalva

SalvaSalva

SalvaSalva

SalvaSalva

SalvaSalva

SalvaSalva

SalvaSalva

SalvaSalva

SalvaSalva

SalvaSalva

SalvaSalva

SalvaSalva

SalvaSalva

SalvaSalva

SalvaSalva

SalvaSalva

SalvaSalva

SalvaSalva

SalvaSalva

SalvaSalva

SalvaSalva

SalvaSalva

SalvaSalva